CSE 115 - Spring 2007 - Introduction to Computer Science for Majors I |
|
|
Lab 3IntroductionIn order to successfully design and built large software systems we need to manage their complexity. We will do this by designing systems so that they are composed of small, independent parts with well-defined responsibilities which interact with each other. These small simple parts can be developed and tested independently of each other. The complexity of the software system as a whole arises from the interconnections and interactions amongst the component pieces. In lecture we discussed how to model systems of interacting entities in terms of their properties (or characteristics) and their capabilities (or the services they can offer to other entities). The capabilities of objects determine how they can communicate with each other. The relationships which a given object has with other objects determines which objects it can communicate with. In lecture we explored one of the relationships which objects can have with each other. In this lab we will focus in particular on the instantiation dependency relationship. The instantiation dependency relationship exists between two objects when one object uses another object in some way. It is for this reason that the relationship is sometimes called the uses a relationship. This relationship can be expressed in Java by simply having one object create a new instance of the other object. We have spent this past week learning about methods and how to use them to communicate with our objects. We have also learned that objects can have a common interface. If objects share an interface, then we know something about the capabilities those objects had in common. We might not know exactly how a particular object will react to a particular message, but have the important knowledge that an object CAN react to that message. ObjectivesThe high-level objectives of this lab are to have you,
Assignment SpecificationsThe fields of DNA analysis and forensic science are exploding with interesting problems to explore. From mapping the human genome to solving the crime of the century, these fields have taken over the spotlight in recent times showcasing where real cutting-edge discoveries are happening often. For this lab, you will play the role of investigator, analyzing a set of unidentified cells and observing their behaviors to try to help determine how the cells react under certain circumstances. What do we know about cells? Put away your Intro to Bio textbook, and instead, look here at the ICell interface. All cells will implement this interface and have each of these methods defined on them. Let's take a moment to discuss each of these methods now.
Given the right circumstances in a laboratory environment, cells can grow. Luckily for us, the Applet class in Lab 3 provides such an environment for our cells. Asking a cell to grow will enable you to see the unique way that each cell changes as it grows.
We can also contribute to the death of our cells in the laboratory environment. When we ask cell to die, you will be able to see the unique way in which each type of cell dies.
When looking at our cells, it is often times better if we can stain or die them a particular color so we can see them better during observation. This method will allow us to give a color of our choice to our cells. Note that some cells accept stains and change colors, while other cells' behavior can be far more elaborate. Helpful HintsRead through the entire lab before you start working, so that you know what to expect. Make sure you save your work often, and keep track of what you are expected to submit. Do not be afraid to refer to earlier labs to recall what things mean or what commands are available for you to use. It might be especially important to refer back to Lab 2 for information about checking files out from the repository and Jarring and submitting your work. ReadingMake sure you have read chapter 2 and 3 of the book before coming to lab. Also make sure you have reviewed your lecture notes. Lab set-up tasks (If you are working at home see these directions for this lab)At your lab session your teaching assistant will briefly discuss how to carry out each of the set-up tasks below. She or he will also be available to answer questions you might have. Before you start work on the lab itself, you must carry out each of the following set-up tasks. Your teaching assistant will guide you through this process.Step 1: Log inStep 2: Start EclipseYou may have an icon on your desktop that you can double-click. If you
did not set that up in Lab 2, you will need a terminal window and will need to
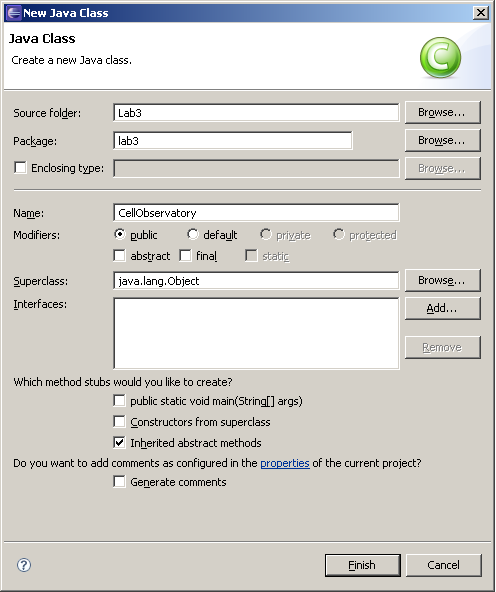
type Step 3: Check out Lab3 project from LabSkeletons repositoryClick on your CVS view (or open it if it is not already open) and open the LabSkeletons repository (click on the "+" or triangle to the left of its name to "spin" it open). Open "Head", and then select Lab3. Now right-click on Lab3, and select "Check out". The Lab3 project will appear in your workspace.Lab DesignNow you're ready to start working on the lab itself! It is important to come up with a design for your program prior to writing it. The UML class diagrams introduced in lecture will help in this endeavor and will be central to discussions throughout the class. Right now we want you to understand how to take a UML class diagram that includes the dependency (uses a) relationship and generate Java code for that. Since it is still early in the semester, we will help you create the UML that your lab should implement. Your submitted lab must implement the UML class diagram discussed in recitation. As the semester progresses, you will be responsible for coming up with your own design for your projects.
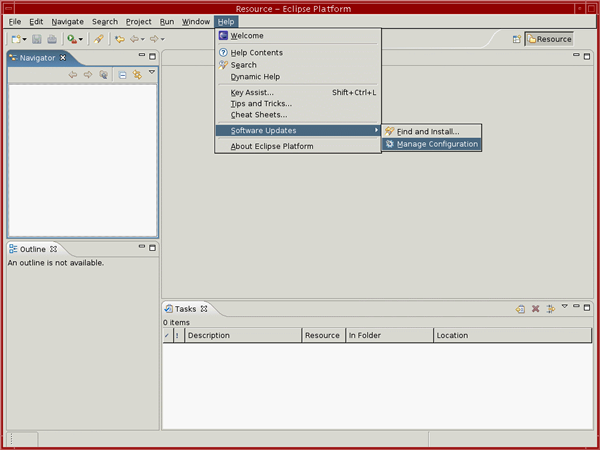
Using Green to create your UML diagramsStep 1: Make local plug-ins availableTo do this, go to "Help" -> "Software Updates" -> "Manage Configuration".
This will open up the "Product Configuration" window.
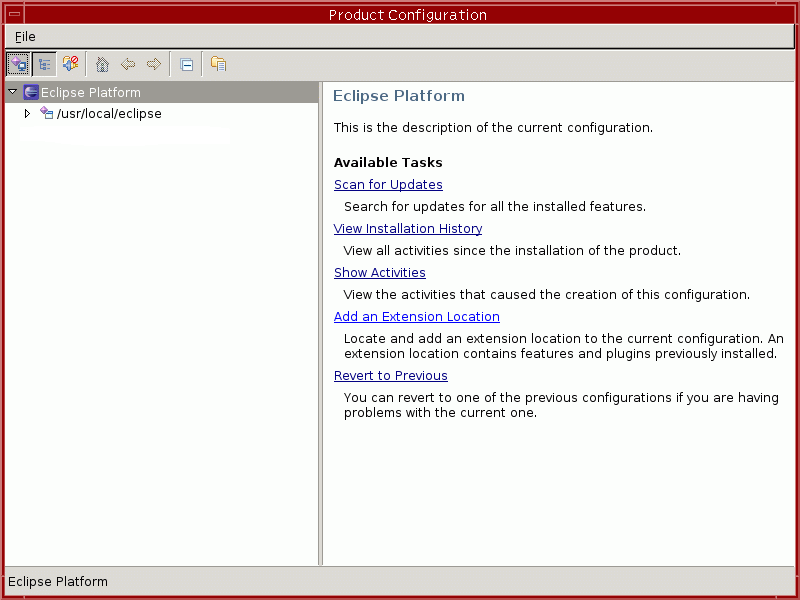
Select "Add an Extension Location" from the right-hand window. You will see the following window:
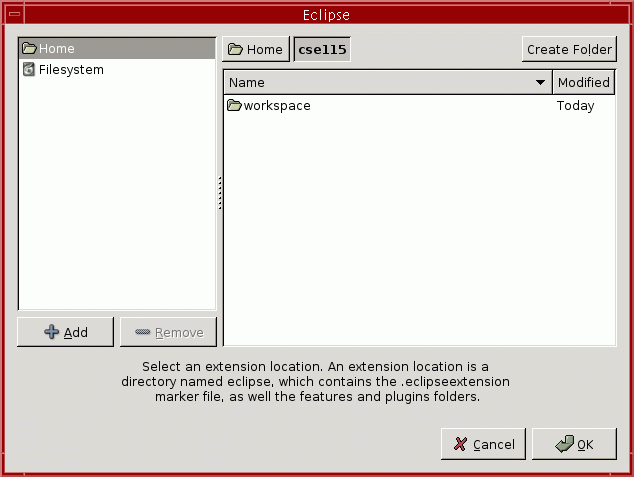
Click on "Filesystem" in the left-hand pane and browse to /projects/CSE115/eclipse Once you've done this, click "OK". After you click "OK" Eclipse will ask whether to restart the workbench:
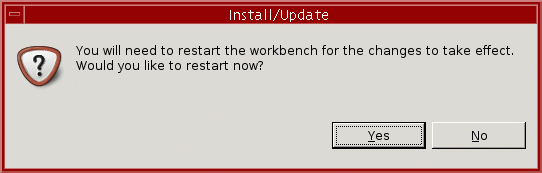
Click "Yes" to restart the workbench. When you do, your Eclipse window will disappear for a little while, then Eclipse will start up again. Open the
|
| Date of lab | Due date for electronic submission |
|---|---|
| Tuesday, February 6 | Monday, February 12 |
| Wednesday, February 7 | Tuesday, February 13 |
| Thursday, February 8 | Wednesday, February 14 |
| Friday, February 9 | Thursday, February 15 |
Announcements | Labs | Meetings | People | Resources | Schedule | Syllabus |
Last modified: Sat Feb 3 16:29:08 2007 © Adrienne Decker |