CSE 115 - Spring 2007 - Banner
   CSE 115 - Spring 2007 - Introduction to Computer Science for Majors I
CSE 115 - Spring 2007 - Left Navigation CSE 115 - Spring 2007 - Lab 8

Lab 8

Introduction

The time has come for you to take the design of a project into your own hands. We'll give you a specification of what the program is supposed to do, and some hints, but the rest is up to you.


Working From Home? Click here for any special directions


New Concepts Covered

The following are the new concepts covered in this lab.
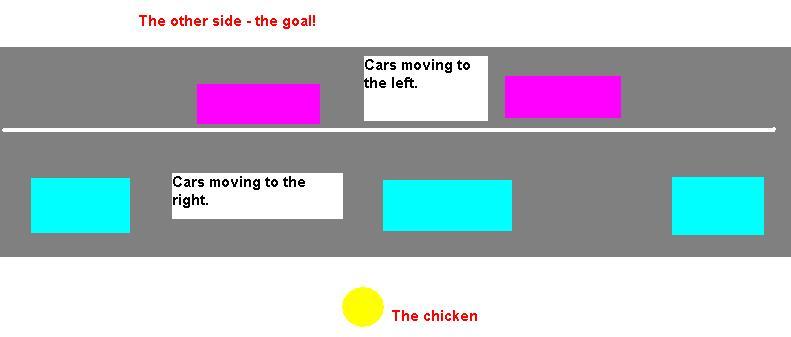
  • Designing your own solution from a specification
  • Collections
  • Iteration over a collection
  • Controlling your own animation with Timers
  • Collision detection
  • if-statements
  • Key Listeners


Assignment Specification

You will write an Application that is a game, the 115 Staff has dubbed "Chickener". The purpose of the game is for the player to get their chicken to cross the road. If the chicken makes it to the other side, the player wins. The only obstacle standing in the player's way are cars and other vehicles that drive down the street. The player controls the chicken with the keyboard.

Below is a sample drawing of what the game board could look like:


Helpful Hints

Think and plan before you begin. Start early. Set goals and milestones for yourself as you go. Make sure you have reached a goal before moving on to the next step. Make goals small and attainable (e.g. shape appears on screen, shape appears on screen in location I would like it to, etc.)
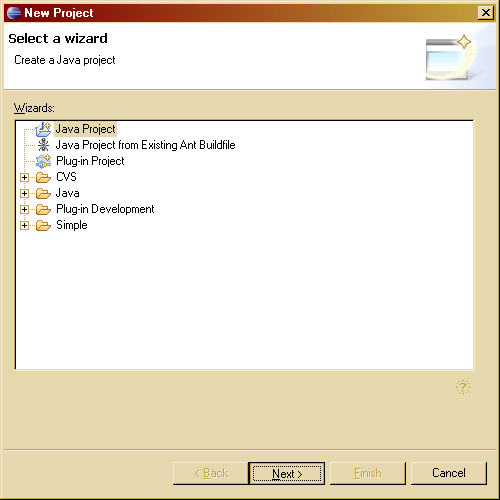
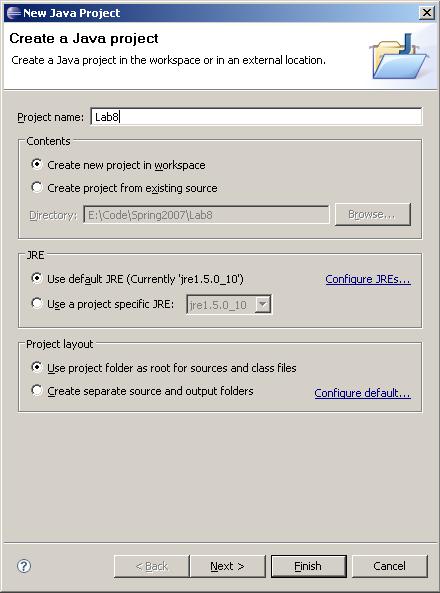
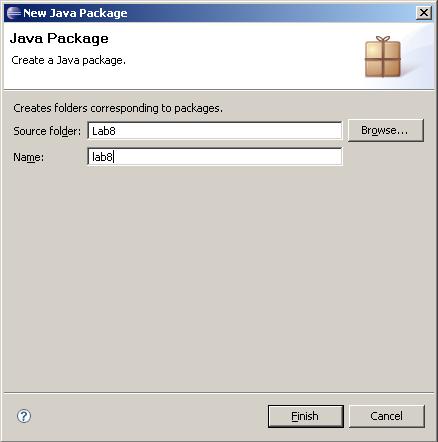
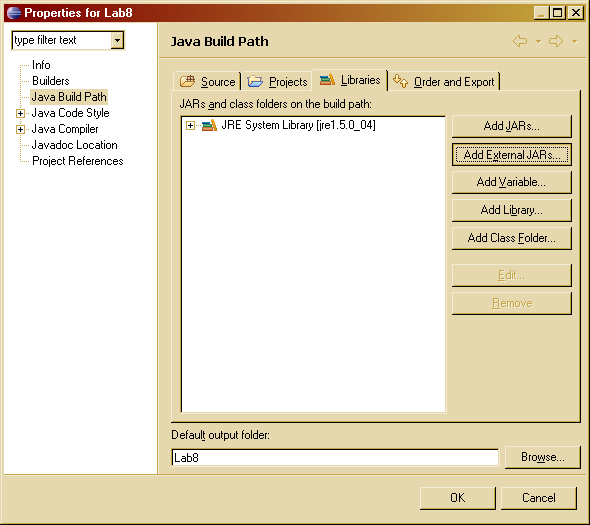
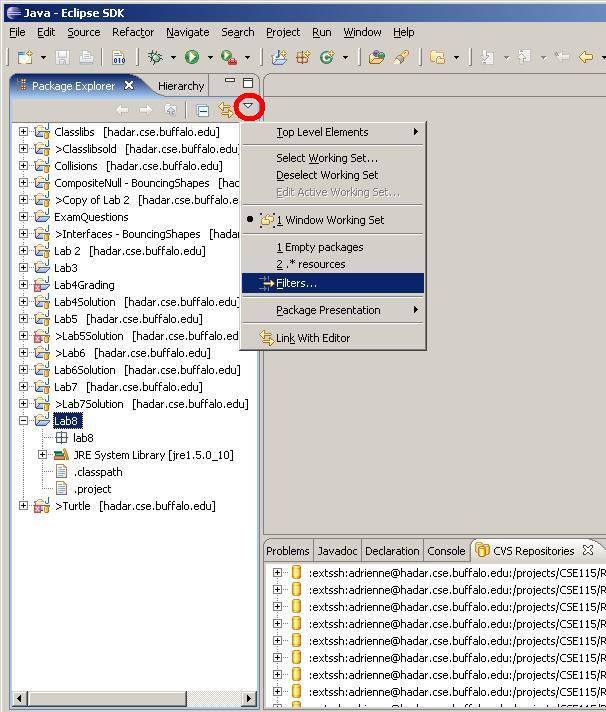
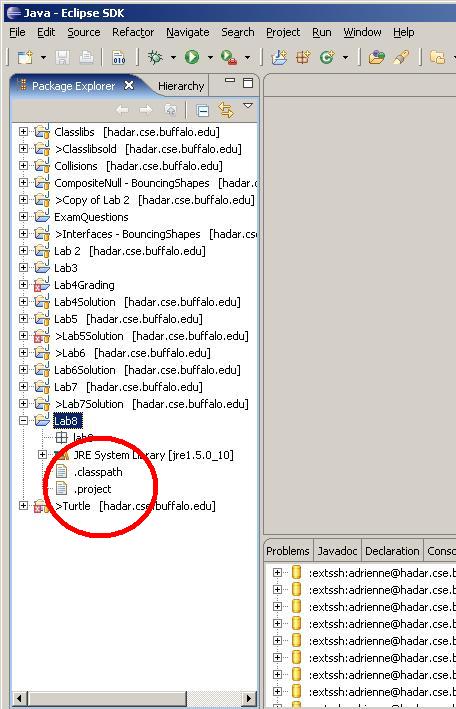
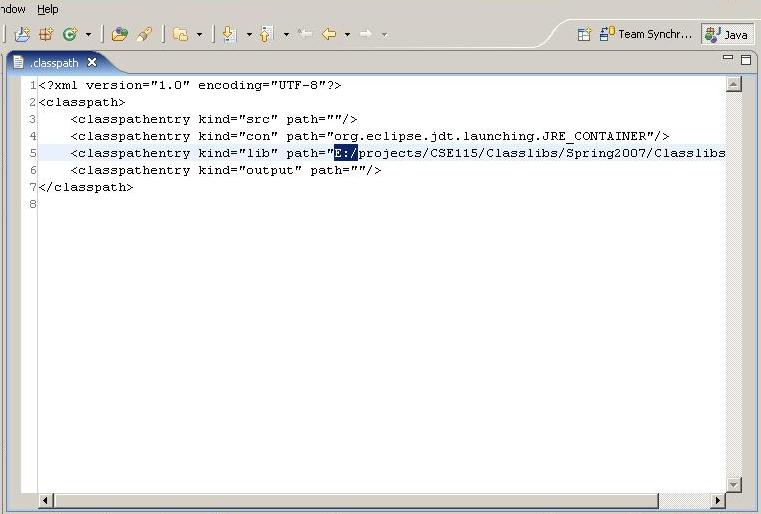
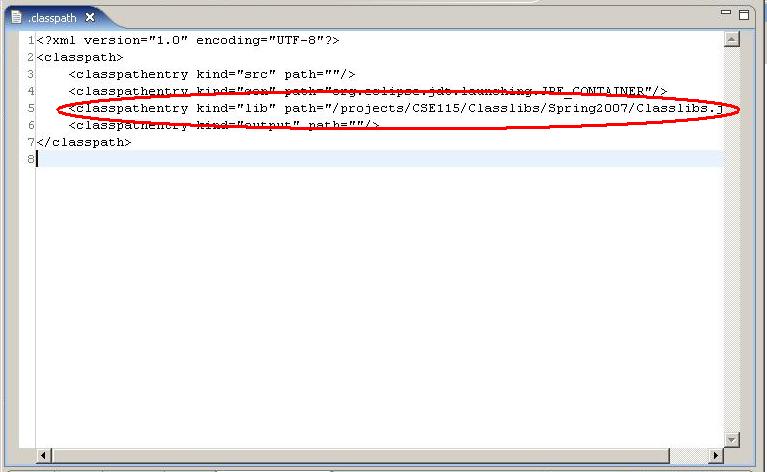

Lab tasks

At your lab session your teaching assistant will briefly discuss how to carry out each of the tasks below. She or he will also be available to answer questions you might have. You must carry out each of the following tasks.

Create a new project in Eclipse

This time, there's no skeleton. You must create your own project from scratch. Here are the steps you need to follow:

  1. You're going to be developing your code in a project called "Lab8." To create a new Java project in Eclipse, under the File menu, select New -> Project.

  2. Select "Java Project" and click Next. Name your project "Lab8." If you see that the Java compiler being used is 1.4 in the "JDK Compliance" section, click the "Use a project specific compliance" button and select "5.0" from the dropdown menu. Then click Finish. You will see the new project pop up in the Package Explorer.


  3. Now right click on the project, and select New -> Package.
  4. Name the package "lab8." Then click Finish. All of your work will be in the lab8 package.


    Congratulations: your project, along with a new package, is officially created! But, in order for you to use cse115-specific libraries, such as the graphics package, you must explicitly tell your project to include the Classlibs.jar archive. Steps 5-8 will explain this process.

  5. Right-click on your project folder and select "Properties."
  6. In the left pane of the "Properties for Lab8" window, select "Java Build Path."
  7. In the right pane of the "Properties for Lab8" window, click the "Libraries" tab.
  8. Click "Add External JARs..." This is where the magic happens. Navigate to /projects/CSE115/Classlibs/Spring2007/ in the JAR Selection dialog and double click Classlibs.jar. Click OK on the Properties window. You're done!
    (Well, except if you have creating this project for the first time NOT on styx. If you have done this at home or on your laptop, then you need to follow steps 9 - 13. Failure to do these steps will result in your project not working and automatic grade of 0 being assigned for your solution.)
  9. When you attach an external archive on a non-Unix machine, the information about the location of the archive gets saved (for example, the C:\). This will cause your project not to work on the Unix systems on campus, or even perhaps another Windows machine running Eclipse. Therefore, we need to change the classpath variable associated with this project. You need to modify a file named .classpath in order to do this. This file is actually a part of every Java project that is created, but by default, it is not shown in the package explorer, so we need to make it visible, first, you select the downward facing arrow on the package explorer tab (circled in red below) and get the menu shown below to drop down.

  10. The following pop up will appear. It is important that the .* resources is UNCHECKED just like the image below.

  11. When you select "OK", notice that the following files (circled in red) appear in your package explorer window. Double-click on the file named .classpath to open it in the editor. If you are not seeing these files, go back to step 9 and redo steps 9 & 10.

  12. Note the contents of the .classpath file. The actual contents are not important, but you are looking for the entry that is highlighted in the image below. Note that there is a E: before the library entry for classlibs. We want to remove that (and any other directory information from the file.

  13. You should make the above entry look like the finished entry in the image below. Save this file and close it when you are done.


Lab Requirements

  • When program begins, chicken and street appears. Cars begin to travel in both directions shortly after the start of the program automatically (that is, once the program begins to run, the game is on!).
  • Chicken is movable using the arrow keys.
  • Cars move in both directions (one lane to the right, one lane to the left).
  • When car and chicken collides, game over, player has lost. Player should be told they have lost.
  • When chicken reaches other side, game over, but player has succeeded. Player should be told they have won.


Lab Design

Once again you are required to design your solution to the lab. Create a file called Lab8.dia in your project and submit it with your jar file.

Once again, remember to design and code iteratively.


Extra Credit

To encourage you to be creative we are holding a contest for lab 8 submissions. The grand prize is 10 points extra credit (up to a maximum of 100 total points) on your exam average!

There are 2 categories: 1) Overall technically most improved and 2) Most creative take on the theme of game.

Second place contestants will receive 8 points extra credit while third place gets 5 points extra credit on their exam average.

The competition is open across all sections of the course.

To compete in this competition, you should decide whether you want to be in the creative competition or the technical competition, and complete your Lab 8 program.

After the labs are graded, those submissions that have successfully completed all the requirements of the lab will be eligible to be judged.

To be judged, you will be required to present your program and its technical or creative merit in front of the Spring 2007 contest judging panel. A sign-up sheet for presentations will be available - tentative date TBA. All students are invited to the contest presentations, whether submitting or just as a spectator.

Good luck to all!


What you hand in

When you are finished, you need to export your solution from the Eclipse environment so that you can submit it. You need to follow the same steps as you did for disconnecting from the repository in Lab 2 . If you are not sure how to do this, please refer back to those instructions. This time, you should name your Jar file Lab8.jar. Your JAR should include your Java Source Code files and a UML diagram representing your solution to the problem named Lab8.dia.

Then you can submit the Lab8.jar file using the electronic submission program. If you do not remember how to use the the submission program, refer back to earlier labs.

Not so secret tip - we spent time in Lab 6 focusing on what our code looked like and you will be awarded/deducted points based on that as well as your code's functionality. You can safely assume that the same will apply to Lab 8.


Due Dates

Due 11:59:59pm the day before your recitation meets the week of April 9th, 2007.


CSE 115 - Spring 2007 - Footer


Last modified: Mon Mar 26 11:40:10 2007
© Adrienne Decker