Installation
JIVE is composed of a set of plug-ins and features for the Eclipse Platform, and is distributed using Eclipse's update manager. JIVE requires the following software to run:
- A compatible operating system: Windows, MacOS, Linux.
- The recommended Java Development Kit is JDK 8 from the Oracle website. There are several later releases and they can also be used.
- The recommended Eclipse is the IDE for Java Developers (not the IDE for EE Developers). There are several Eclipse releases available at eclipse.org.
- A sample Java and Eclipse for Windows users is posted here. MacOs and Linux users should download directly from Oracle and Eclipse websites.
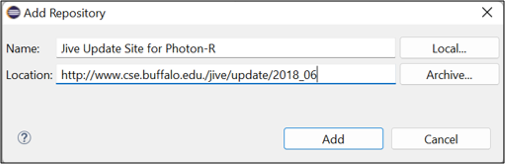
- The installation instructions given below apply to Linux, MacOs and Windows users. For Eclipse versions 4.8 or earlier, use the following Jive update site:
http://www.cse.buffalo.edu/jive/update/2018_06.
For later versions of Eclipse, omit the suffix 2018_06 from the abovementioned update site.
Instructions for Installing JIVE (click on the images to enlarge)
0. First install JDK 8, then install Eclipse.
1. Start Eclipse and from the Help menu, select Help → Install New Software.
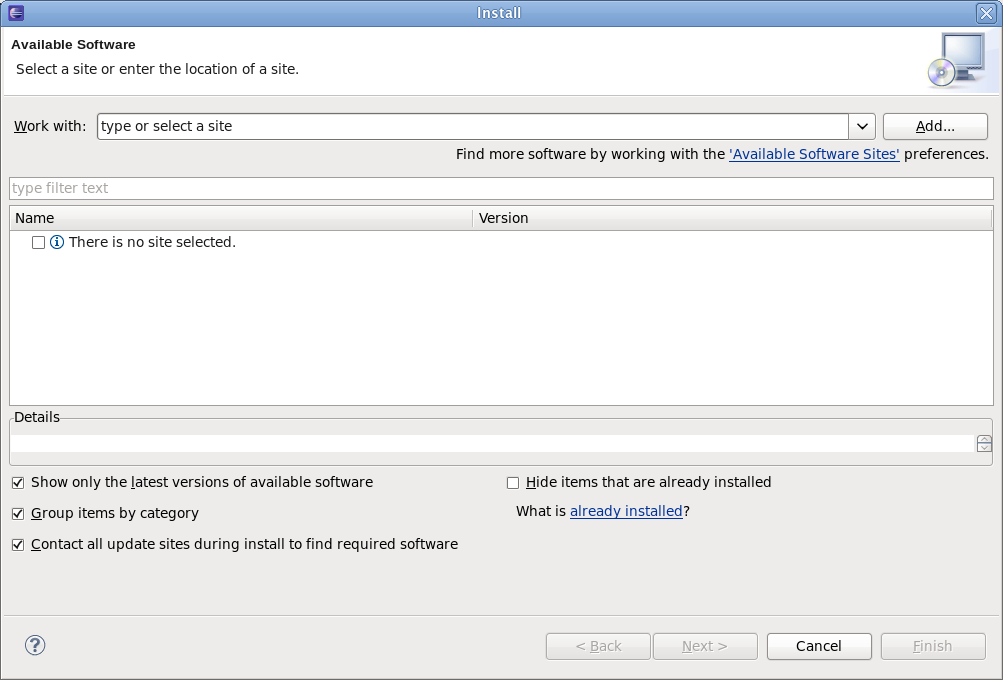
2. Click on the Add... button to add JIVE's update site, then provide the following information:
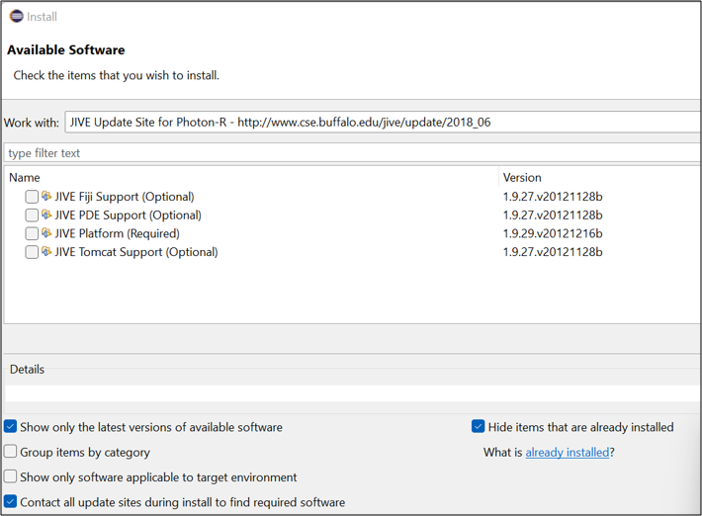
3. Select the newly added JIVE. A few moments later you should see the JIVE feature with the JIVE platform component. Select the feature and click on the Next > button.
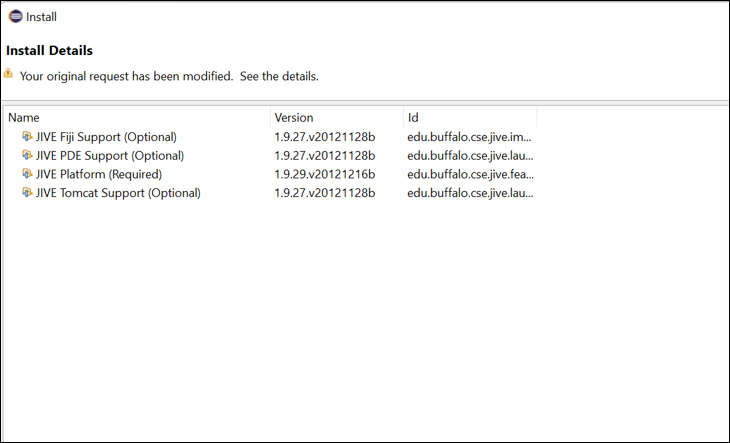
4. The JIVE Platform has now been selected for installation. Click on the Next > button.
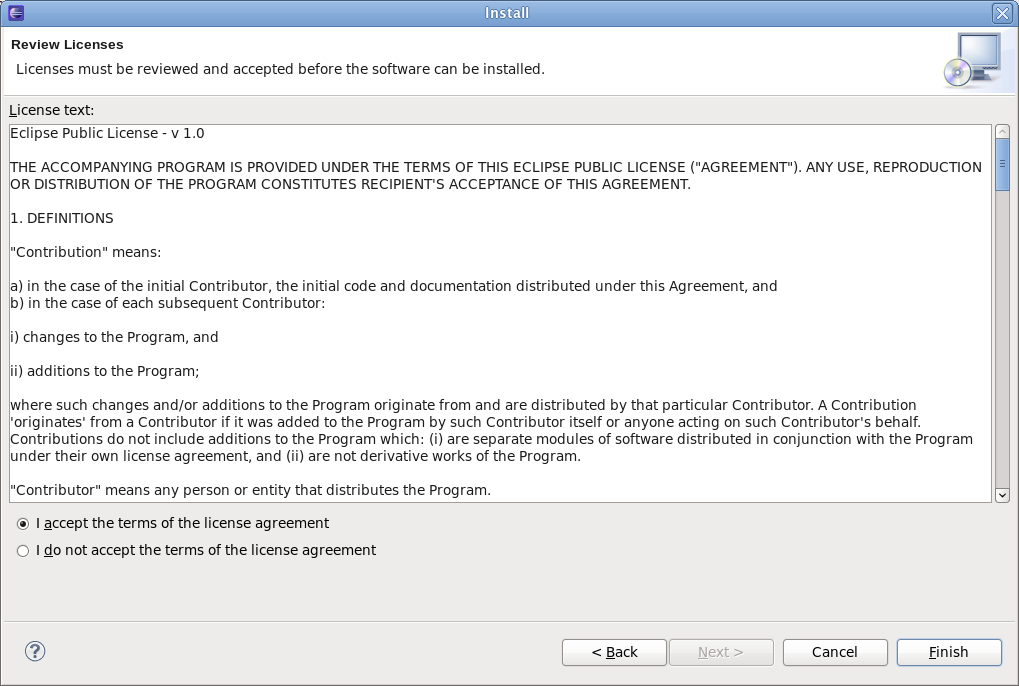
5. Review the license agreement, select the I accept the terms of the license agreements option, and click on the Finish button.
6. All the necessary files will be downloaded and installed automatically. In the process, you will get a warning that Eclipse is unable to establish the validity or authenticity of the software. It is valid and authentic, so go ahead and click the Install anyway button.
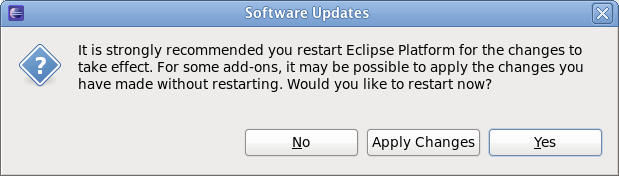
7. Eclipse will ask if you would like to restart. Click Yes.
Once Eclipse restarts, JIVE will be installed. For information on how to use JIVE, see the Tutorials section.