CSE 115 - Fall 2006 - Introduction to Computer Science for Majors I |
|
|
Lab 2 (Working at Home)IntroductionThere will probably be times throughout this semester that you would like to work at a location other than the Baldy lab. In order to do this, you must prepare your home machine by installing the correct tools needed to do the work for this class. This lab will mimic the Lab 2 you just completed in recitation, but will allow you to start on the process to getting your home computer ready for the semester. ObjectivesThe high-level objectives of this lab are to have you,
Assignment SpecificationsWork with Eclipse, describe properties and capabilities of some object. Helpful HintsRead through the entire lab before you start working, so that you know what to expect. Make sure you save your work often, and keep track of what you are expected to submit. Do not be afraid to refer to earlier labs to recall what things mean or what commands are available for you to use. ReadingMake sure you have read chapter 1 of the book before coming to lab. Also make sure you have reviewed your lecture notes. It might also be helpful to begin looking at Chapter 1 of the Eclipse book. Lab set-up tasksAt your lab session your teaching assistant will briefly discuss how to carry out each of the set-up tasks below. She or he will also be available to answer questions you might have. Before you start work on the lab itself, you must carry out each of the following set-up tasks. Your teaching assistant will guide you through this process. If you are trying to do this lab from Baldy 21, you are reading the wrong page, please consult this link. Step 1: Turn on computer and create a connection to the InternetThis process will vary from machine to machine, so hopefully you can do this on your computer. Step 2: Install Appropriate SoftwareFirst, from the TechTools CD (see http://wings.buffalo.edu/computing/software/ if you do not have the CD) download:
All of these programs are located under Utilities. Follow the instructions
for download and install all the programs. If you are working on a Mac, you
do not need either of the first two. See notes for Mac about FTP. You also
have a way to make a connection to a terminal built-in. You can download the
VPN client if you'd like. Directions for using PuTTY/ creating a connection
to a terminal window are located here.
Follow them and create a connection to
Second, read the directions for Installing Eclipse and Plug-ins. You first need to download the JDK and then you need to download the Eclipse self-installer. (Directions for Macs are a little different, please make sure you are reading the correct directions). For now, DO NOT install anything from the section entitled "Installing UML relationships for Green ".
Step 3: Create a workspace on your machineCreate a directory named
Step 4: Start EclipseThere is probably a shortcut to Eclipse on your desktop or in your Start menu after installing Eclipse. Click on it to open Eclipse. Once you have started Eclipse, you might be prompted for which workspace
you'd like to work in. You should select the
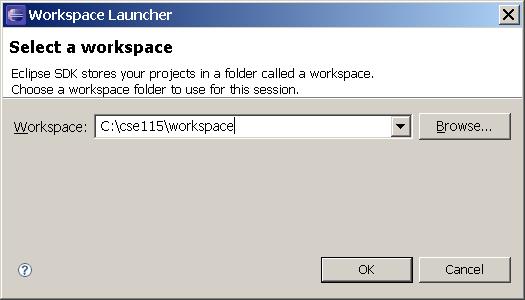
Be sure to check the box "Use as default and don't ask me again", and then click "OK".
Step 5: Import preferences fileNext you need do tell Eclipse a few things about how you want it to behave. This is a one-time process. In other words, once you have successfully carried out these steps you will NOT need to repeat them in lab. The preferences file is now located in your home directory on styx. You need to download this file to your machine. Open FileZilla and a connection to pollux like described in the directions for using FileZilla. You should see the file cse115.epf in your home directory. Download this file to your local machine. It might be easiest to dowload the file directly to your C:\ drive. To import the file into Eclipse, you will first need to open the Import dialog. Do this by selecting "Import..." from the "File" menu. It is common practice to abbreviate menu selections that you need to make in instructions like these. For example, we can abbreviate select "Import..." from the "File" menuby simply writing "File" -> "Import". This time we'll show the screen shot of the menu item being selected, but from now on we'll simply write menu selections using this abbreviated method. Your teaching assistant can help you if you have trouble locating the correct menu selections.
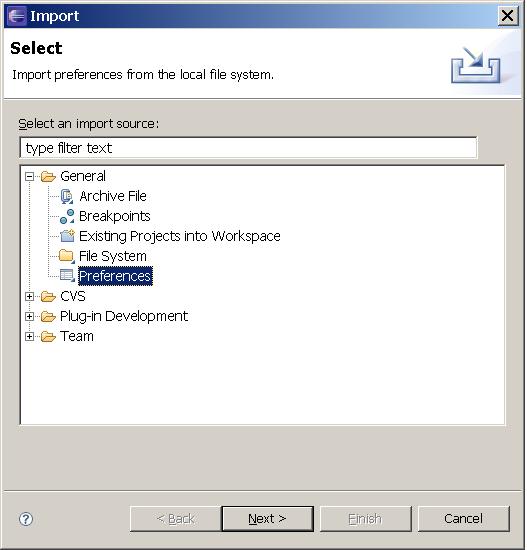
An "Import" dialog window should appear.
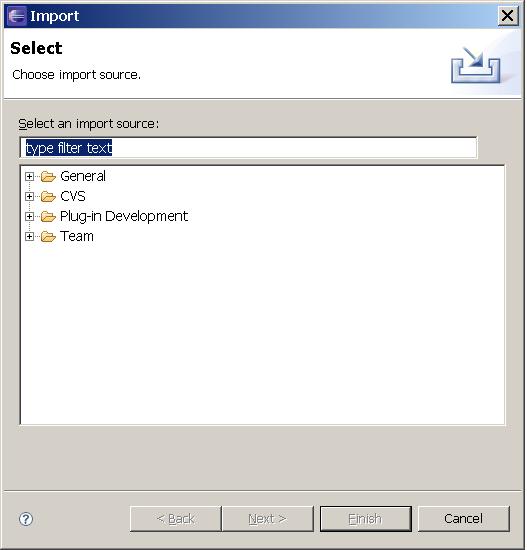
Select the + sign (or the > symbol depending on your OS) and expand the "General" Folder. Note that there is now an option for t "Preferences", as below. Select it and then click "Next".
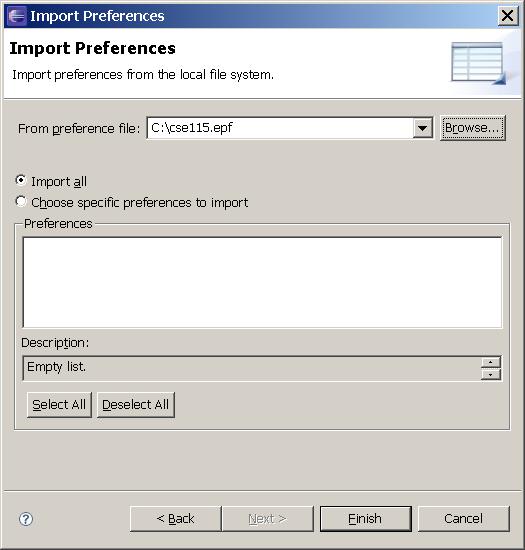
This opens up an "Import Preferences" dialog window. Browse to the file
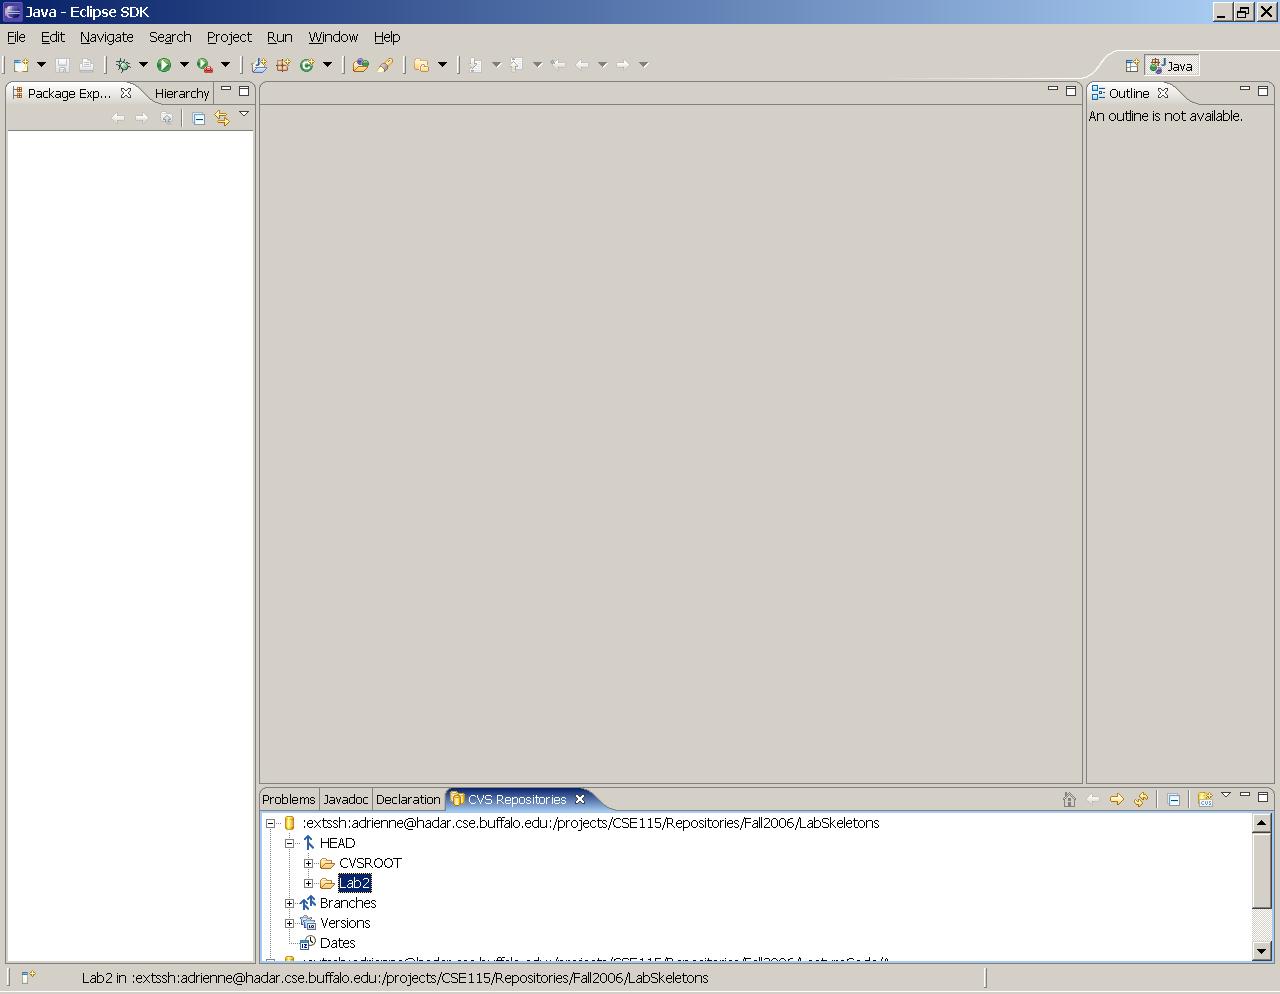
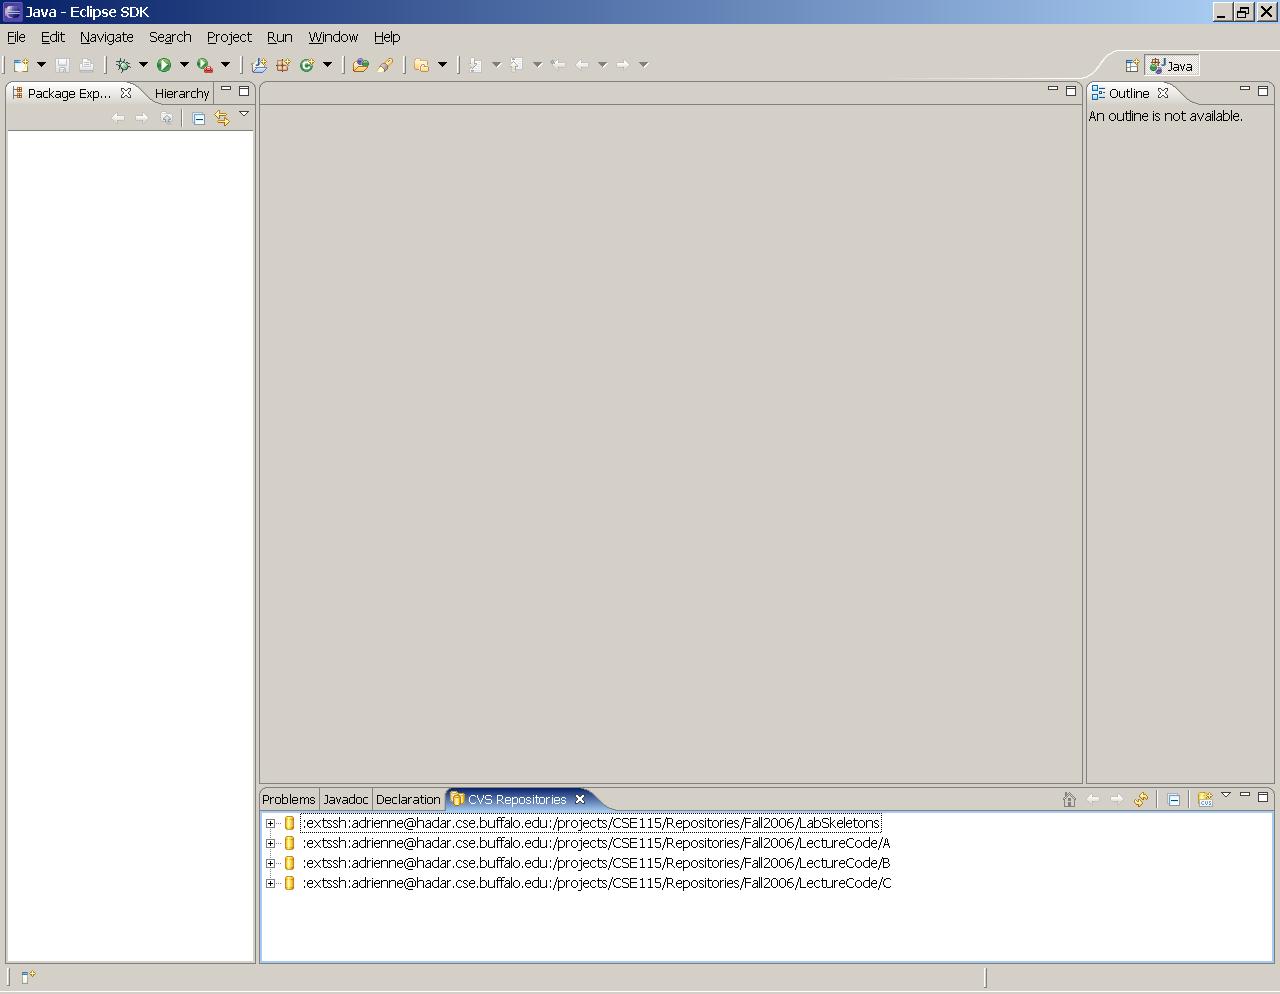
Step 6: Seeing the connections to code repositoriesIf you do not have a tab in the lower portion of your screen that says "CVS Repositories", you should open that View so that you can see what Repositories you have connections to. To do this, select Window -> Show View -> Other. You should then select to expand the entry for CVS and select CVS Repositories and click OK. You will now see a view tab on the bottom of your screen that shows which repositories you have access to:
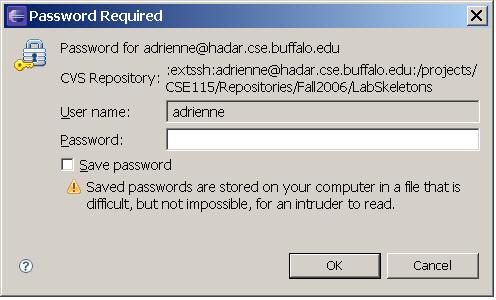
Step 7: Working on your Project from homeChances are that you will probably be working on your projects both from your home machine as well as in Baldy 21 throughout the semester. Therefore, you need to not only know how check out from the repository, but also how to transfer your files from one machine to another. Check out Lab2 project from LabSkeletons repositoryOpen the LabSkeletons repository (click on the "+" or triangle to the left of its name to "spin" it open). Open "Head", and then a dialog will pop up prompting you for your password. The password here is the same one you type to log into the machine in Baldy 21. Type your password in and then click "OK".
Then the files in the Lab Skeletons Repository will be visible. Select Lab2:
Now right-click, and select "Check out". In the left-most pane you will now see the Lab 2 project in your workspace. You should expand out the project to see what is inside it. You will notice a file named Lab2Answers.txt. You should open this file now and input your name and recitation section. In this file, you will type in your answers for the next section. It is this project that you will submit for credit for this Lab.
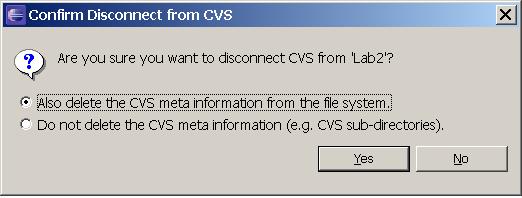
Getting files ready to transfer from your home machine to school machine (or vice versa)First, you need to export your solution from the Eclipse environment so that you can transfer it. You should disconnect your project from the CVS repository from which you checked out the lab skeleton (if you have not already done so). To do this, right click on the project name, and select "Team" -> "Disconnect". In the "Confirm Disconnect from CVS" window that pops open select "Also delete the CVS meta information from the file system.", then click "Yes":
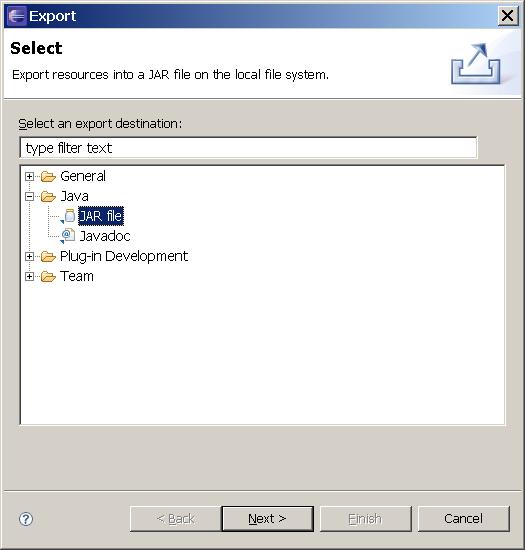
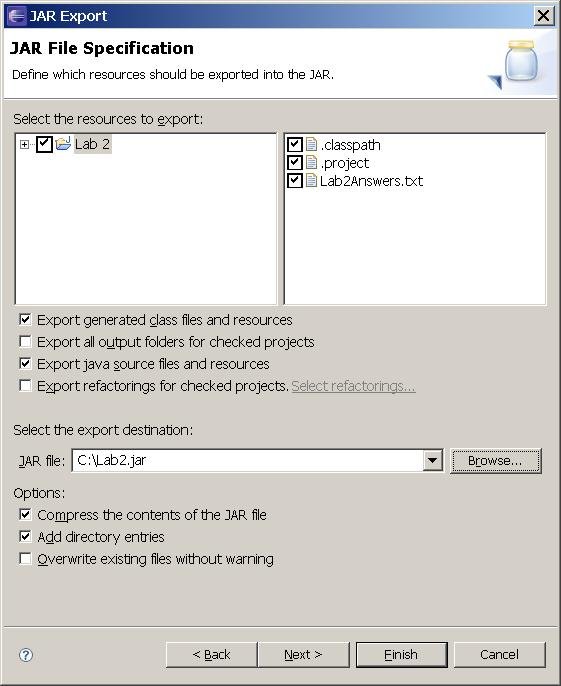
Now it is time to package up your completed work to get it ready for submission. Right click on the project name, and select "Export...". An "Export" window will open. Under Java, select "JAR file":
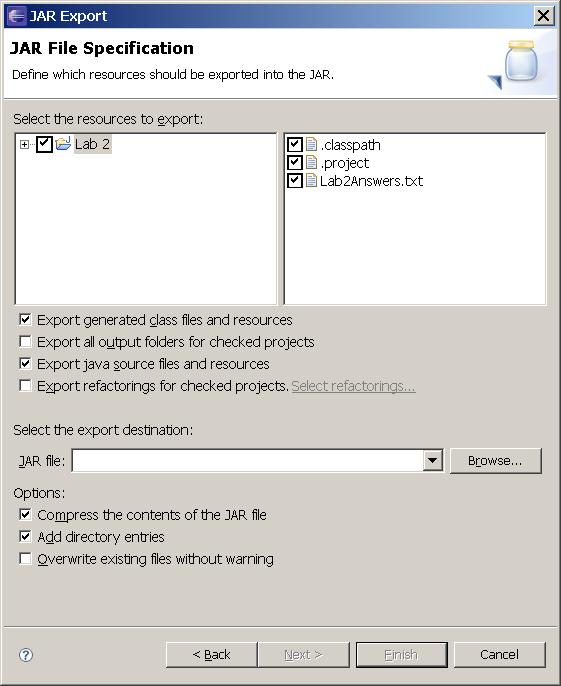
To pick a name for the file you are exporting to, click the "Browse" button next to the field labelled "JAR file:". Your dialog should now look like this:
Click "Finish". Now you have a JAR file on your machine (either at home or on styx). You need to transfer this file to the other system using FileZilla.
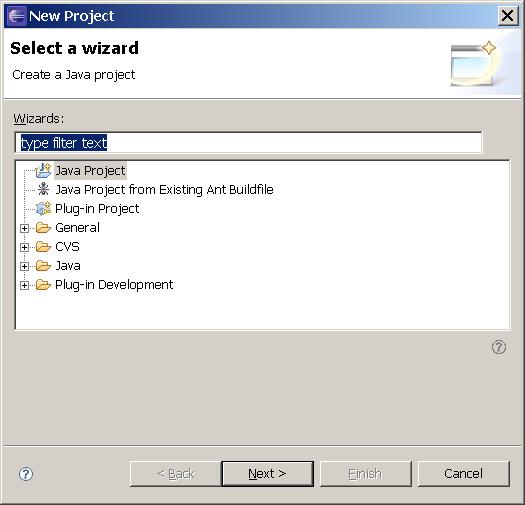
Importing the file into the other system's workspaceOK - so you worked on one system and have now transferred a JAR file to the other system. To get the updates to take effect on that system, you need to import the files to your workspace there. If this is the first time you are working on this project on the system, you will need to begin by creating a project in your workspace for the system. If you already have a project on your workspace, skip down to here. To creat a project, right click on the package explorer pane and select New -> Project and the following dialog will appear and you should select Java Project and click Next>
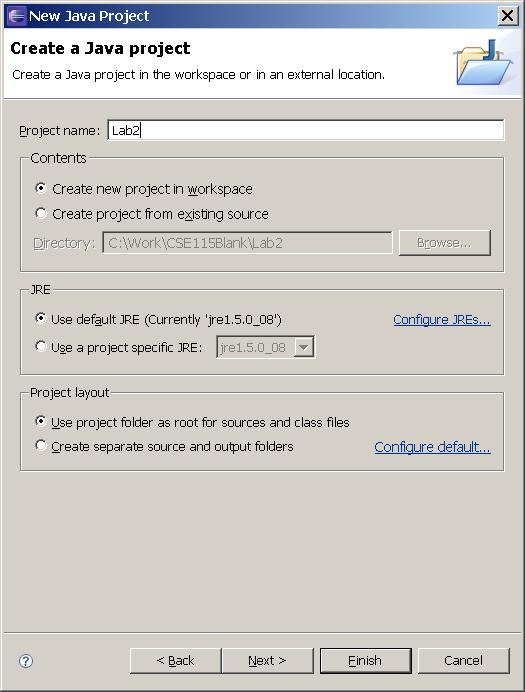
You will get another dialog. Enter the name of the project and click Finish.
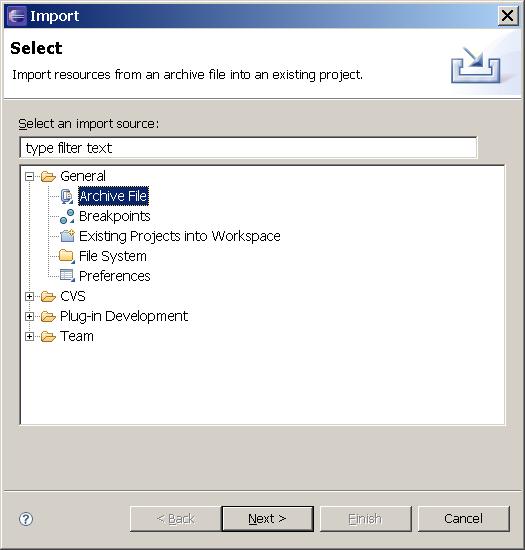
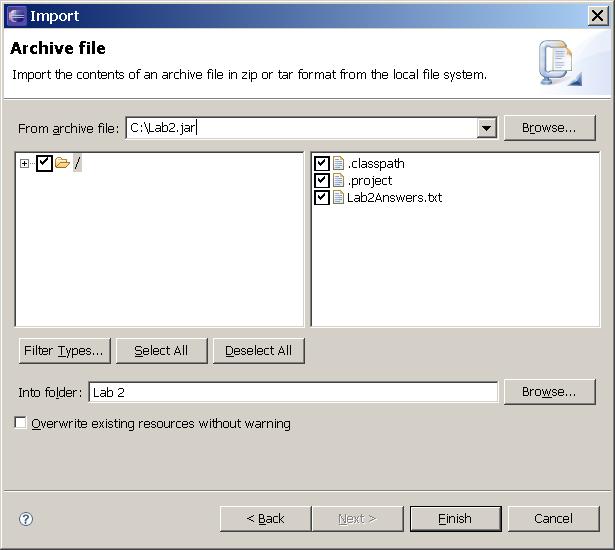
A project will now appear in your workspace. Now, right click on the project and select "Import" and Archive File and select Next:
In the next dialog, Browse to the JAR file you just transferred and it will appear in the "From Archive File" text box: You should click the Select All button so that all of the files in the JAR get imported and then click Finish.
You might be prompted if you want to overwrite files. You should select "Yes" or "Yes to All". Now the files that you were working on on the other system are available
to you. When you are done working on the assignment, you need to export the
files to a JAR. You should always make sure that the latest files are on If you are ready to submit your work, refer to the instructions below.
Lab Assignment (for Lab 2)As a means of collecting some background information, browse to www.wikipedia.com, and find the entry for “myspace”. Read all about it. Go to www.myspace.com and search for your favorite band, or visit the myspace page of someone that you know. Use the search feature to find an interesting page, just please try to keep it appropriate for a college lab. You can start with www.myspace.com/beatles. Note that all of the features on a typical myspace page attempt to capture and showcase the entire personality of a person, group, or band, in order to place that information in the context of a social networking system. It does a good job at this, because it has created space on that page for everything that makes someone “interesting”. Not only are a person’s interesting characteristics listed and behaviors described, the page itself has interesting properties and capabilities that lend itself to social networking. The myspace page is a model for a person or band, and the myspace site is a model for a community. (A community object that contains people and band objects) Your task for this lab is to identify those things that make a person or band unique and interesting. Include everything that you would want to include on a person’s or band’s page. List them as properties and capabilities in your Lab2Answers.txt file. The first entry contains an example… a person’s list of friends, which displays pictures and allows you to link to their site. Fill in the remainder of the spaces in the file. Your second task is to take the view of a computer scientist, and identify the capabilities that need to be included in a web page for that person or band to be a member of a social networking community. Should there be blogs and lists, exchanges of various types, places to go for private and public chats? The first entry again contains an example… the on-screen music player that allows a band to showcase their music. In effect, design the person/band class, that will fit into the larger community class that will contain person/band objects. Identify the capabilities of the person/band class that enables participation in the community. When you are finished, be sure to save your file. What you hand inWhen you are finished, you need to export your solution from the Eclipse
environment using the same procedure as before. Make sure you also transfer
the file to Then, you can go to campus and log into a computer in Baldy 21, or you can
use PuTTY to get a connect to Once you are on submit_cse115a1 Lab2.jar at the Unix prompt. Due dates (for Lab 2)You have one week from the meeting of your lab to submit your solution. For example, if your recitation meets on Tuesday, September 12th then you must submit the lab by 11:59 pm on Monday, September 18th. The due dates are summarized in the table below. You are always welcome to submit early. If you submit more than once, the later submission will simply overwrite the previous one. To check that your lab was submitted, you can always refer back to the Submit Inspector on the Resources page of the website. After you have entered your user name, your submissions will be shown. Clicking on the name of a file that is a zip file will show you the contents of the zip file so you can verify that you indeed zipped up all the correct files.
|
Announcements | Labs | Meetings | People | Resources | Schedule | Syllabus |
Last modified: Sat Sep 9 12:39:00 2006 |