CSE 115 - Fall 2006 - Introduction to Computer Science for Majors I |
|
|
Lab 9IntroductionCongratulations! If you're reading this, it means you've decided to stick it out to the very end. You've survived painters, cells, swimming fish and more bouncing shapes than anyone cares to count. Up until now, we've told you what to do -- but times they are a changin'. It's time for you the CSE115 students to stand up and be counted. To say, "We are sick of the monarchy! We are tired of having projects that all look the same! We are not just numbers! NO! We are programmers!" Rise up little programmers and read on... Extra CreditTo encourage you to be creative we are holding a contest for lab 9 submissions. The grand prize is 10 points extra credit (up to a maximum of 100 total points) on your exam average! There are 2 categories: 1) Overall best GUI and 2) Most
creative.
For the most creative category, you must write a
creative story about your GUI,
include it as Second place contestants will receive 8 points extra credit while third place gets 5 points extra credit on their exam average. The competition is open across all sections of the course. To compete in this competition, you should decide whether you want to be in the creative competition or the technical competition, and complete your Lab 9 program. After the labs are graded, those submissions that have successfully completed all the requirements of the lab will be eligible to be judged. To be judged, you will be required to present your program and its technical or creative merit in front of the Fall 2006 contest judging panel. A sign-up sheet for presentations will be available - tentative date TBA. Good luck to all! New Concepts CoveredThe following are the new concepts covered in this lab.
Assignment SpecificationHere's your chance to be creative. The assignment specification is simple: create a "kick ass" graphical user interface that accomplishes some minor task. Use your imagination, artistic ability, and programming skill to make something that wows your friends and the TAs. Think moving shapes, changing colors, and 3-D rotating fractal landscapes. We've shown you how to create color changing and crazily swimming fish. What will you make? To provide some direction we require the following elements:
As a final option, you can make your drawing canvas or graphic react to mouse clicks. By creating a GUI we hope that you will get a solid grasp of creating graphical programs using a mix of the native swing graphical components and the graphics framework we have provided for you. Use your creativity! Helpful HintsMake sure to do the reading listed below. Don't hesitate to also examine
the Read the Classes' Public Interfaces section below. Before coding, you should draw a picture of what you want your GUI to look like. From this, determine which graphical components you will need and which graphical containers you will need to format them. Also, you should draw yourself a class hierarchy diagram to understand which objects have to communicate and in what way. If you know exactly what you are doing before you start coding, you should have no problem writing it.
Preparatory workIn order to be able to carry out the tasks required during your lab session, you must come prepared. Do the following before coming to your lab session: ReadingReview the graphics code (and class notes) that were discussed in class.
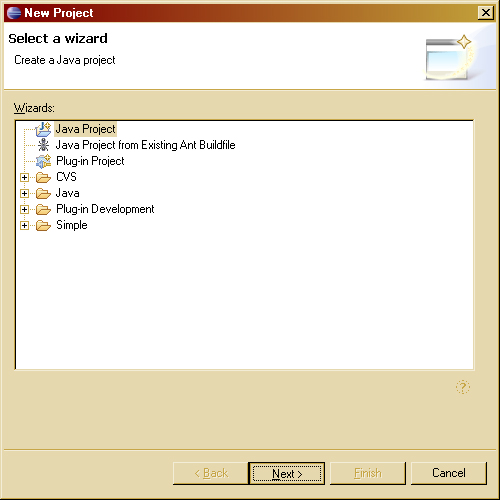
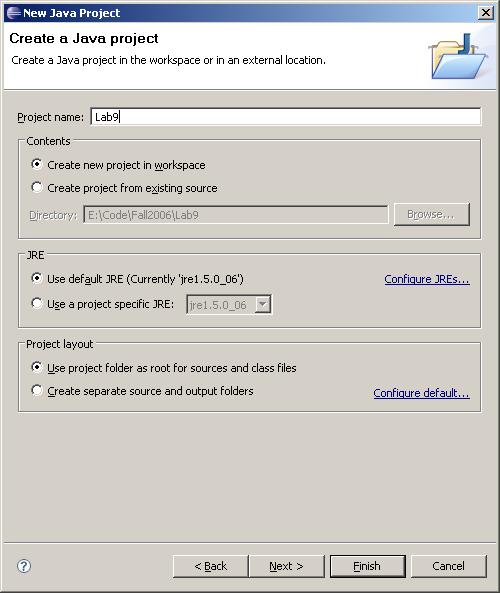
Lab tasksAt your lab session your teaching assistant will briefly discuss how to carry out each of the tasks below. She or he will also be available to answer questions you might have. You must carry out each of the following tasks. Create a new project in EclipseThis time, there's no skeleton. You must create your own project from scratch. Here are the steps you need to follow:
Lab DesignOnce again you are required to design your solution to the lab. Create a
file called Use your picture of your GUI and the Classes' Public Interfaces to decide what has been written and what you need to create. Once again, remember to design and code iteratively
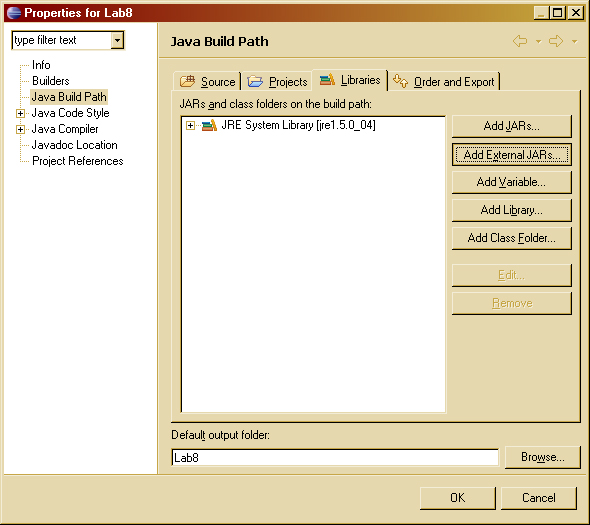
Classes' Public InterfacesReally the only stuff you need to read are the for the Classlibs located on the Resources page and the main Java API docs, once again linked off of the Resources page.
Submission DirectionsAfter you are finished writing your code, jar the Lab9 project and submit the resulting jar file, Lab9.jar. You must follow all directions about filenames exactly, otherwise your work will not be graded. Now you are ready to submit your work. Use the electronic submission program that corresponds to your recitation.
Due DatesDue 11:59:59pm on the day before your recitation meets during the week of November 13th.
|
Announcements | Labs | Meetings | People | Resources | Schedule | Syllabus |
Last modified: Fri Oct 20 08:26:32 2006 |